

What you see depends on your permissions
You only see the tabs your role lets you use.- With Settings access (admins, and anyone whose role includes it) you see every tab below.
- Without Settings access you see General with just your Mobile PIN, My mailbox (your own sender, in place of the full Senders tab) and Notifications.
- Team needs permission to view the team, and Activity Log needs permission to view logs. Either can be given without full Settings access.
Workspace
- General
- Preferences: workspace defaults that apply to everyone. The Advance renewal threshold (see Renewals), Bank statements required and Month-to-date statement from day (see Uploading statements), and the Lender recommendation threshold (see The recommended threshold).
- Branding: your company name, logo, submit button text, PDF authorization disclaimer and the application form colours.
- Mobile PIN: install the phone app and set your personal PIN.
- Team: who can sign in and what they can do. See Adding a team member.
- Pipeline: your stages, their phases, and the events that move deals between them. See Deals and the pipeline and Pipeline stage events.
- Developers: API keys, Webhooks and Connected apps, for anyone building on NextLevel MCA. The details are on the Developers tab of this site.
- Integrations: outside services your workspace connects with its own account, DataMerch, PACER and CRS credit pulls. Bank statement analysis isn’t set up here; see Bank statement analysis.
Intake
- Application Form: preview the merchant application, set how it behaves, copy the embed code and download a blank PDF. See The application form. For applications a merchant started but didn’t finish, see Unfinished applications.
- Fields: which fields the application form and the PDFs show, and their order on the form. See Fields below.
- Passes: automatically pass approved deals to another rep when they aren’t funded. See Passes below.
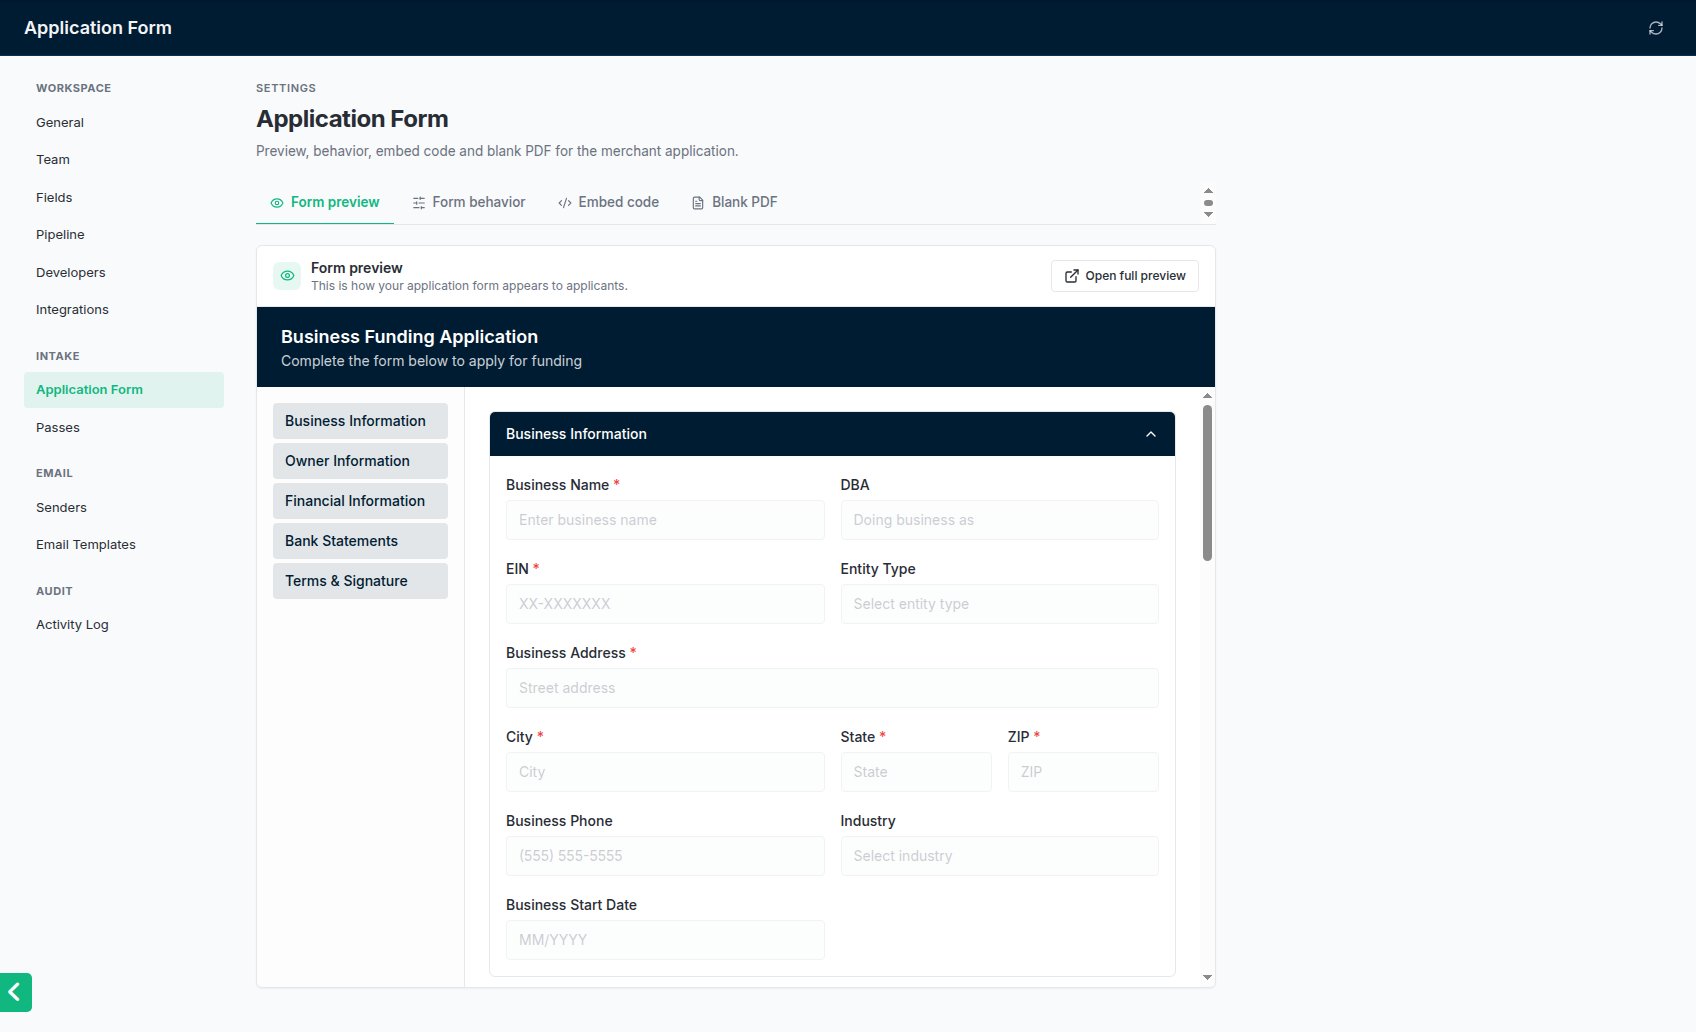
Settings → Application Form: preview, behaviour, embed code and the blank PDF.
- Senders: the mailboxes NextLevel MCA sends email from. People without Settings access see My mailbox instead, where they connect their own. See Connecting your mailbox and The default sender.
- Templates: the default wording of the emails and texts the app writes for you. See Templates below.
Audit
- Activity Log: a record of everything that changed in the workspace. See Activity Log below.
Personal
- Notifications: what you hear about, in the bell and by email. These settings are yours alone. See Notification preferences.
Fields
Settings → Fields lists every field on the application, split into sections such as Business Information and Owner Information. For each field you choose:
Req and Form apply to the merchant’s application form and the New Deal form alike. A field you take off the form is never required there. On the merchant’s form, the owner’s first name, last name and email always show and are always required, whatever the switches say, because an application needs to say who it’s from and how to reach them; the owner always signs too. State Incorporated and the existing advance questions are only on the New Deal form.
Settings → Fields has a list for each section of the application form: Business, Owner and Financial information. The list is the order the form shows.
- Standard fields come in locked groups (marked with a lock), such as Business address (street, city, state and ZIP) or Owners, because they’re laid out together on the form. Drag a group to move it. Click it to see its fields and change their Req, Form, PDF and Short switches, or edit a field’s label and placeholder.
- Custom fields can go anywhere: drag one between any two groups, for example to ask “Have you ever defaulted on a business loan?” right after the business name.
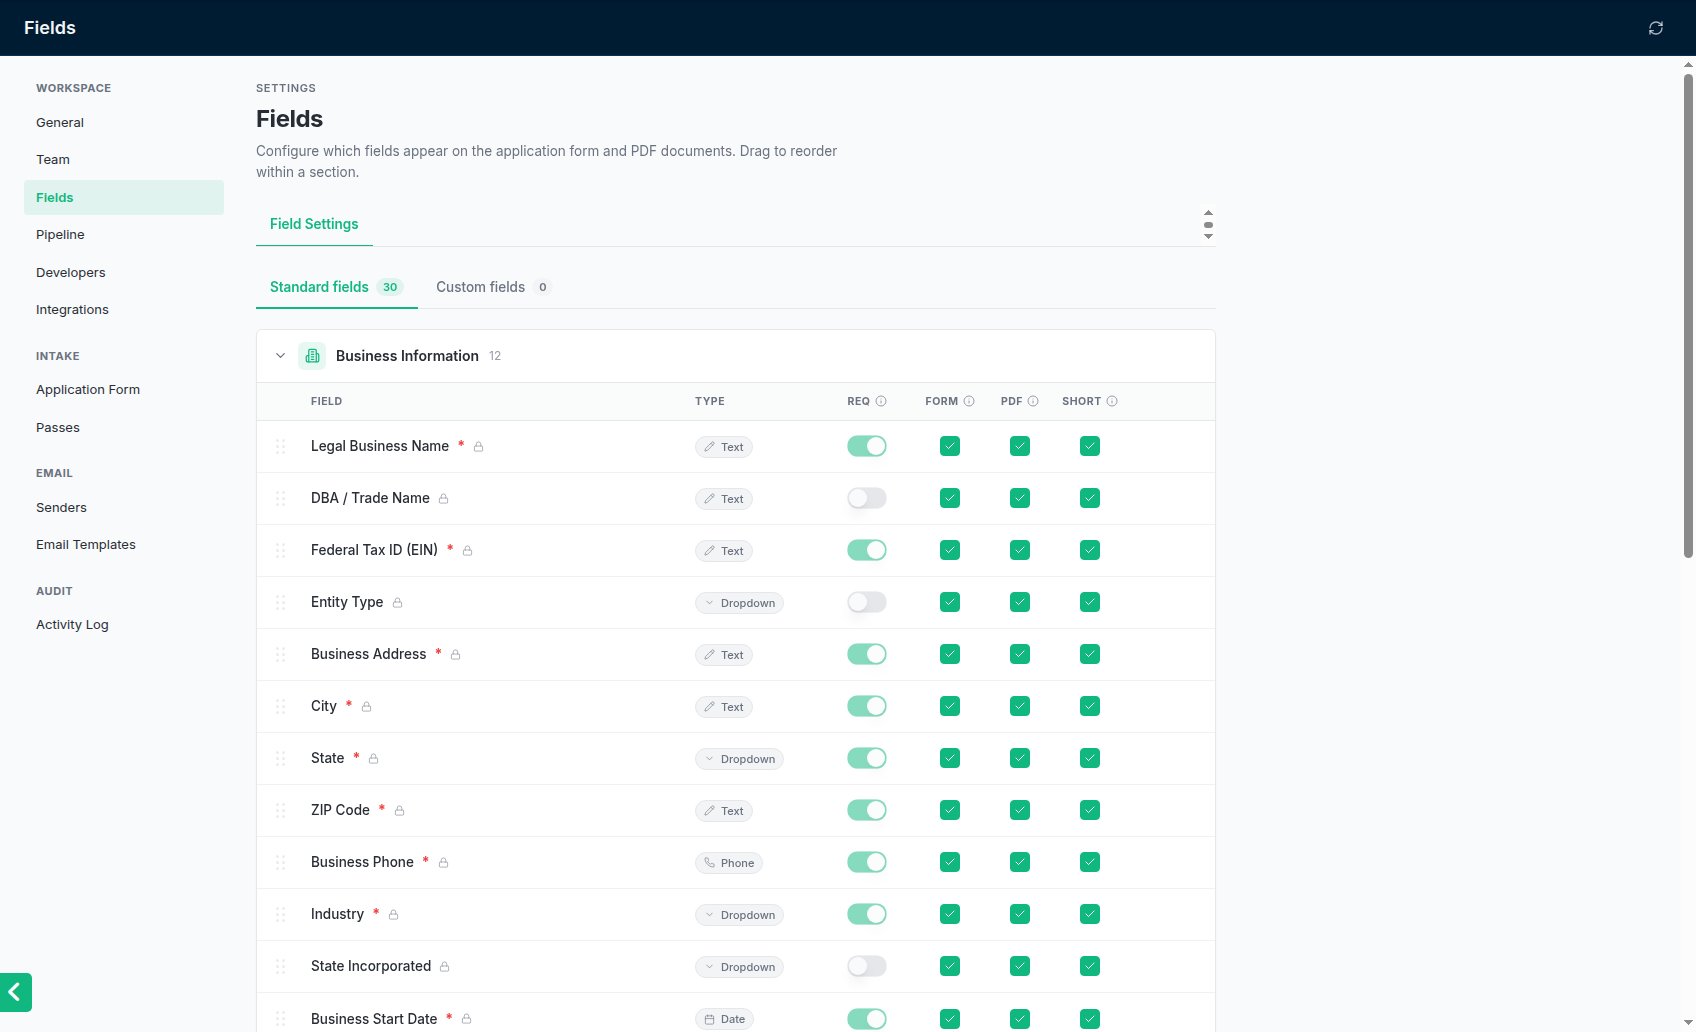
Settings → Fields: which fields the application form and PDFs show, section by section.
Passes
Passes keep approved deals moving when the rep they belong to doesn’t fund them.1
Turn it on
Open Settings → Passes → Configuration and turn on Enable passes.
2
Set the rules
Days before pass is how many days after approval an unfunded deal is passed on. Deals that are funded, closed out or in the Dead column are never passed. Rotation method picks the next rep: Round robin (in order), Least deals (the rep with the fewest open approved deals) or Random. Turn on Return to original rep to let the deal go back to the first rep once every other rep has had it.
3
Choose who's in the rotation
Under Rotation pool, every active user starts switched on. Turn off anyone who shouldn’t receive passed deals; at least one rep has to stay on. With everyone on, reps added later are included too. Then save.
Templates
Settings → Templates has one tab for each email and text the app writes for you:
For each one you edit the Subject line and the Body. Click Show variables and then a variable, such as the business name or the owner’s first name, to insert it at your cursor. Variables work in the subject too, and they’re filled in when the email is sent. Restore default puts back the standard wording; nothing changes until you click Save template.
Emails to merchants are branded. They go out in a layout with your logo, colour and company name from Settings → Application form, and end with the sender’s signature (their business card when rep cards are turned on). The button variables, Upload button and Portal button, become a button with the merchant’s secure link and a copyable link underneath. If you remove the button, it’s added at the end of the email, so a merchant email never goes out without its link.
Emails to lenders stay plain: a normal email from the rep’s mailbox, with no branding.
Texts are plain text sent through your CRM. Link becomes the merchant’s secure link (added at the end if you remove it). As you type, the editor shows the length and about how many segments the text costs once names and the link are filled in; carriers bill each segment. Texts go out in plain characters (straight quotes and hyphens), and the default texts end with “Reply STOP to opt out.”, which helps carriers deliver them. The Preview shows the text as the merchant’s phone does.
The Preview shows the email as the recipient will see it, with sample values and your branding. It updates when you click out of the editor.